Dragging a heavy hose around the yard, wrestling with kinks, and tripping over tangled coils are classic signs that your watering setup needs an upgrade. A retractable garden hose reel solves these frustrations by automatically winding the hose back into a compact housing, protecting it from the elements and keeping your outdoor space tidy. However, the installation process can seem daunting if you are unsure where to start. Whether you are mounting it to an exterior wall or a post, this guide will walk you through the entire process step by step. We’ll cover the tools you need, the different mounting options, and the common pitfalls that turn a simple DIY project into a frustrating afternoon. Before you decide on the best placement, it helps to understand the mechanics behind these devices and the specific requirements of your home’s exterior.
Key Takeaways
- Before mounting, locate wall studs or use heavy-duty masonry anchors to ensure the unit supports the full weight of a fully extended, water-filled hose.
- Choosing the correct height (typically 3 to 4 feet off the ground) reduces strain on the hose and makes retraction smoother and easier.
- Installing a vacuum breaker or backflow preventer at the wall faucet is a critical code requirement that protects your home’s drinking water supply.
- Use a hose guide or wall-mounted corner guide to prevent the hose from scraping against sharp exterior corners, which extends the lifespan of the hose.
- Flush the new hose with water before connecting it to a nozzle to remove any manufacturing residue or debris that could clog your sprayer.
Why Proper Installation Matters
Many homeowners assume that installing a retractable hose reel is as simple as screwing a bracket into the siding. This misconception leads to broken brackets, damaged hoses, and water leaks. A fully extended hose filled with water creates significant tension and weight. If the mounting surface is not structurally sound, the unit can tear away from the wall, potentially causing injury or damaging your home’s exterior. Furthermore, a poor installation often results in the hose locking up mid-retraction or failing to stay locked when pulled out. Taking the time to do the job right the first time prevents these headaches and ensures that the automatic retraction mechanism functions as intended. The process involves more than just physical mounting; it requires planning the water path to minimize friction and wear.
Tools and Materials You Will Need
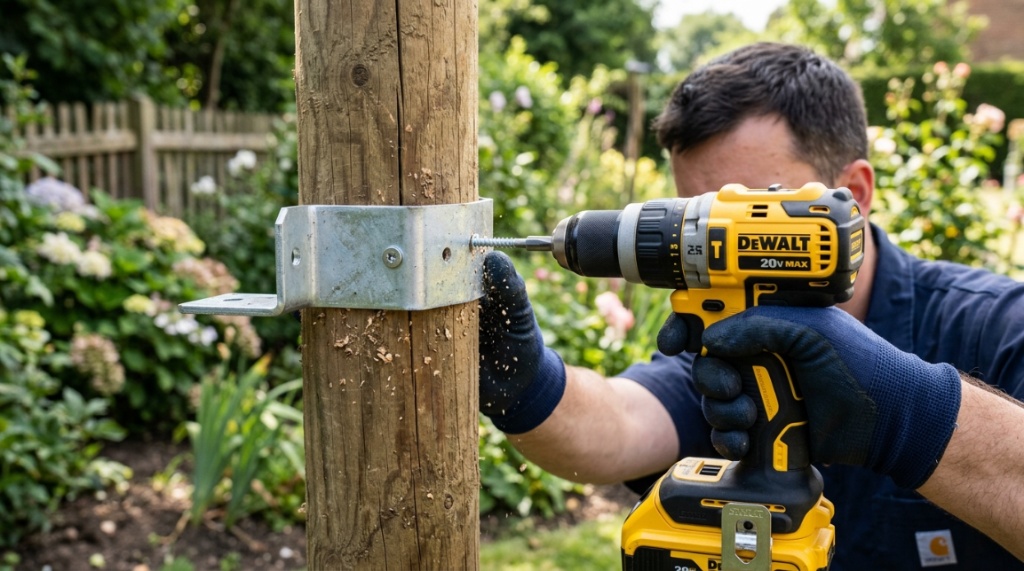
Before you start drilling holes, gather all necessary equipment. A lack of preparation is the most common reason installations take twice as long as necessary. For most standard installations, you will need a power drill with a drill bit set suitable for your wall material (masonry bits for brick or stucco, standard wood bits for siding over studs), a stud finder, a spirit level, a socket wrench or screwdriver set, and a pencil for marking. You will also need the mounting hardware that comes with the unit, but don’t be surprised if you need to upgrade it. The included plastic anchors and screws are often low quality and unsuitable for exterior use. It is highly recommended to purchase stainless steel or galvanized lag bolts and masonry anchors that are specifically rated for outdoor, load-bearing applications. Additionally, you will need PTFE tape (plumber’s tape) for sealing the threaded connection between the unit and the water supply.
Step 1: Choose the Mounting Location and Height
Your first decision—where to place the reel—significantly impacts usability. The location must be near a water source, obviously, but it also needs to be practical for the areas you intend to water. If you need to water a front garden and a side yard, you cannot install the reel on the back wall of the house. The rule of thumb is to install the reel on the wall perpendicular to your primary watering zone. This reduces the chance of the hose kinking at the exit port.
Finding the Wall Studs
If you are mounting to a wood-framed wall with siding, you must secure the bracket into a wall stud. Use a stud finder to locate the studs and mark them clearly. If you hit a stud, you can use lag bolts that will hold up to several hundred pounds. If you are mounting to brick, stucco, or concrete block, you cannot rely on a stud finder. You must use a hammer drill with a masonry bit and insert expansion anchors (often called “Tapcon” or “sleeve” anchors). These anchors expand and grip the concrete as you tighten the bolt. Never mount a heavy reel directly into hollow drywall or plaster without hitting a stud, as the bracket will pull out under pressure. Once your new watering system is fully mounted and ready to use, you might want to upgrade your outdoor privacy and aesthetics by exploring Different fence panel ideas for your garden.
Determining the Optimal Height
The height of the installation is a point of much debate, but the ideal position is generally around 40 to 48 inches from the ground. This places the hose guide at hip level, which allows you to grab the hose comfortably without bending over excessively. More importantly, this height ensures that the hose lies relatively flat on the ground when extended, rather than drooping and dragging. If you mount the reel too high (above shoulder level), the weight of the hose pulling down will cause excessive wear on the internal guide and the stop mechanism. If you mount it too low, the hose will scrape along the ground at the wall edge, damaging the outer casing over time.
Step 2: Install the Mounting Brackets
Once you have marked your stud locations or anchor points, hold the bracket up against the wall and use a spirit level to ensure it is perfectly horizontal. If the bracket is crooked, the hose will not retract evenly and may twist. Use a pencil to mark the screw holes through the bracket’s mounting slots. When you drill, ensure the holes are straight—drilling at an angle compromises the holding strength. For wood studs, drill a pilot hole slightly smaller than your lag bolt. For masonry, drill the hole to the exact diameter specified on the anchor packaging. Clean the dust out of the masonry holes before tapping in the anchors, as a clogged hole will prevent the anchor from seating flush.
When you are ready to finalize the hardware, some kits require you to install retractable garden hose reel brackets that are split into two pieces for easier handling. Align the bracket seams carefully and tighten them incrementally. Do not fully tighten the top bolts before the bottom bolts are started; this allows you to adjust the bracket for a perfect fit. Once all bolts are snug, go back and tighten them all with a socket wrench to ensure they are secure against the wall.
Step 3: Attach the Reel Unit to the Bracket
Most retractable reels feature a mounting pin at the top and a locking screw at the bottom. Lift the reel unit onto the wall bracket, seating the top pin into the corresponding hole. Tilt the unit so the bottom locking mechanism clicks into place. Once seated, secure it with the provided locking bolt or screw. This is a safety measure—do not skip it. The locking bolt prevents the reel from being lifted off the bracket by the tension of the hose or by accidental contact. Double-check that the unit is fully seated before you attach the water supply.
Step 4: Connect the Water Supply and Check Valves
Now that the unit is physically secured, it is time to connect the water. Before attaching the inlet hose (the short piece that connects the reel to your wall faucet), wrap the threads of the wall faucet with PTFE tape. Wrap it clockwise three or four times to create a tight seal. Screw the inlet hose onto the faucet and tighten it with pliers. Do not over-tighten, as this can crush the rubber washers inside the connector.
The Importance of a Vacuum Breaker
This step is often overlooked, but it is crucial for safety. Building codes in most regions require a vacuum breaker (backflow preventer) on exterior faucets. This device prevents contaminated water from being siphoned back into your home’s drinking water supply if there is a sudden drop in water pressure (e.g., when a fire hydrant is opened nearby). If your reel or inlet hose does not have a built-in vacuum breaker, you should install one between the wall faucet and the inlet hose. This is a cheap, simple device that protects your household’s health.
Securing the Inlet Hose
Once connected, run the inlet hose from the faucet to the reel’s water inlet. Use a rubber hose guide or a piece of foam pipe insulation over the hose where it might rub against sharp edges of the reel’s housing or the wall. Turn on the water at the faucet and check for leaks at the connection points. A small drip here can indicate a missing O-ring or a loose fitting—fix this now before moving on, as it will not stop on its own.
Step 5: Flush the Hose and Test Retraction
With the water running, pull out the hose slowly and attach a spray nozzle. Fully extend the hose to its maximum length (usually 60 to 100 feet). Turn the water on fully and flush the hose for a minute or two. This removes any dust, rubber shavings, or debris that accumulated during manufacturing and storage. If you skip this step, that debris will clog the fine mesh inside your spray nozzle, permanently ruining it.
After flushing, turn off the water at the spray nozzle or disconnect the nozzle. To retract the hose, gently guide it back. Do not let go of the hose abruptly, as the rapid retraction will cause the hose to whip around and potentially damage your plants or the hose itself. Let the hose retract slowly, feeding it through your hands to prevent tangles. When the hose reaches the stop collar (the thicker section at the end), listen for a click. This indicates the hose is locked in place. Test the locking mechanism by pulling the hose lightly to ensure it doesn’t slip out.
Common Mistakes to Avoid
Many DIY installation failures share similar root causes. Understanding these pitfalls before you start can save you a trip to the hardware store and the frustration of a leaky setup.
- Ignoring the Water Pressure: Retractable reels are designed for standard household pressure (40–80 PSI). If your home has high water pressure (over 100 PSI), you need a pressure regulator. High pressure will cause the hose to expand slightly, making it impossible to retract smoothly.
- Using the Wrong Mounting Hardware: The screws included with the reel are almost always too short for siding. They are designed to penetrate 1.5 inches of material. If your siding is thick, the screw will not reach the stud, and the bracket will fail.
- Not Planning for Winter: If you live in a climate with freezing temperatures, the reel must be drained and disconnected before winter arrives. Many units have a drain valve; use it. If water freezes inside the mechanics, the expansion will crack the internal gears.
- Installing Around Corners: If you place the reel on a wall that creates a sharp 90-degree turn for the hose, the hose will rub against the corner, causing severe abrasion. Install a hose guide in the corner or change the reel’s location so the hose can lay straight.
Maintenance Tips for Longevity
A retractable hose reel is not a “set it and forget it” tool. A few minutes of care each month will significantly extend its lifespan. Keep the hose completely retracted when not in use, as UV rays degrade rubber over time. Lubricate the O-rings on the inlet connector with silicone grease annually to prevent them from drying out and cracking. If the retraction mechanism begins to slow down, it may be drawing air into the system—check the O-rings at the water inlet. Clean the exterior housing with a damp cloth to prevent dirt and grime from entering the retraction slot. The slot itself can collect tiny pebbles that scratch the hose; wipe it out occasionally to keep the sliding motion smooth.
Frequently Asked Questions
How long does it take to install a retractable hose reel?
Most installations take between 30 and 60 minutes. The variable factor is the wall material. Mounting to wood studs is quick, while drilling into brick or concrete adds time due to the need for specialized anchors and a hammer drill.
Can I install a retractable hose reel on vinyl siding?
Yes, but you cannot mount the bracket directly to the vinyl. You must cut away a section of the vinyl siding in the exact shape of the mounting plate, or fasten a piece of exterior-grade plywood to the sheathing and mount the bracket to that. Mounting directly to vinyl will cause the siding to warp and potentially pull away from the house.
Why won’t my hose retract fully?
This is usually caused by one of three issues: insufficient water pressure in the reel (if it is water-driven), a kink in the hose near the stop collar, or the unit being mounted too high. Ensure the hose is lying flat and straight on the ground, and check that the spring tension mechanism hasn’t slipped off its track.
Do I need to remove the reel in the winter?
You don’t need to remove the whole unit, but you must disconnect the water supply and drain all water from the hose and the unit’s internal reservoir. Leaving water inside during a freeze will cause the housing to crack or the internal fittings to burst.
Can I extend a retractable hose with a second hose?
It is not recommended. The retraction spring is calibrated to pull the exact length of the hose provided. Adding more length increases the weight and resistance, which will cause the spring to wear out prematurely and may prevent the automatic lock from engaging.
Conclusion
Installing a retractable garden hose reel is a straightforward project that requires a bit of patience and attention to detail. The key to a successful installation lies in the preparation: locating solid mounting points, choosing the correct height, and ensuring you have a backflow prevention device in place. By avoiding the common mistakes of using inadequate hardware and failing to plan for winter, you can enjoy the convenience of a kink-free, self-coiling hose for years to come. Following the steps above—from leveling the bracket to flushing the hose—ensures your unit operates safely and efficiently, giving you more time to enjoy the yard and less time fighting with the equipment. Take your time with the initial setup, and you will be rewarded with a solution that looks clean, works flawlessly, and makes watering feel effortless.